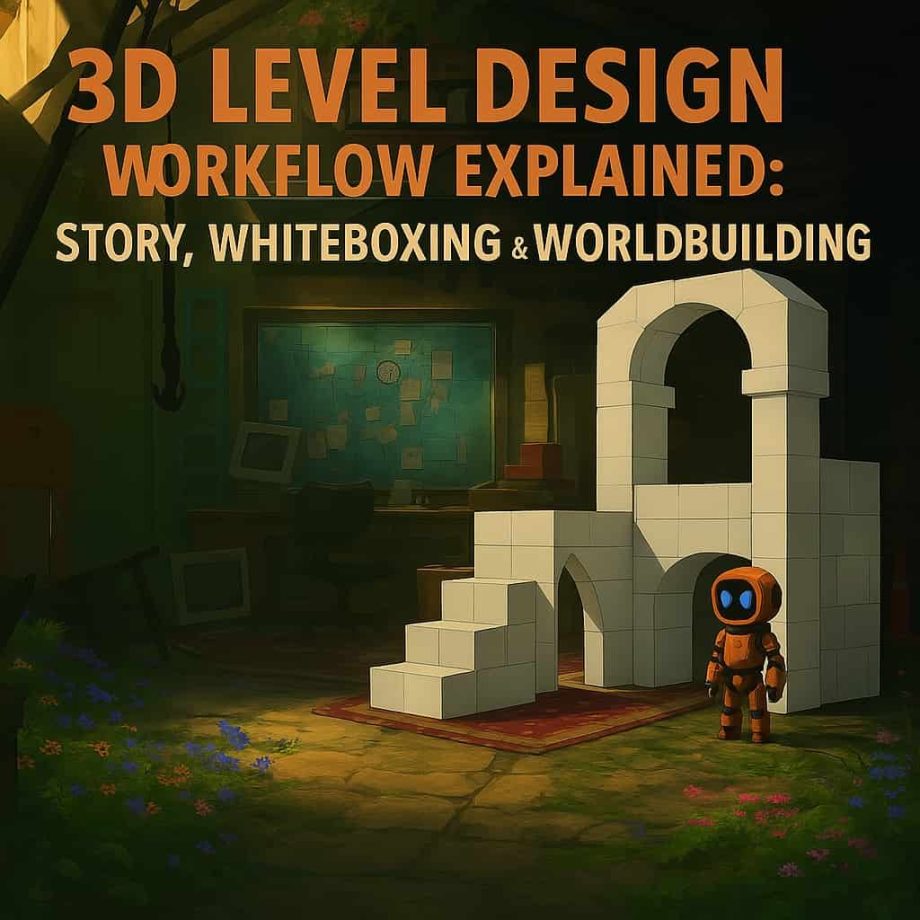
Complete 3D Level Design Guide: From Story and Concept to Playable Worlds
Discover the true science of level design, its impact beyond graphics, and essential tools to block out, iterate, and narrate effective game spaces.
Learn how to design 3D levels from narrative to testing — with tools, workflows, and best practices for game developers.
Estimated Reading Time: 12–15 minutes
1. What Is 3D Level Design — and Why It’s More Important Than Graphics?
-
✅ What Is 3D Level Design?
3D Level Design refers to the process of creating playable environments in three-dimensional space that support the gameplay, story, and pacing of a video game.
Scientifically, it’s the spatial and experiential structuring of game environments to create meaningful, navigable, and emotionally resonant gameplay.
It includes decisions about layout, player movement, timing, enemy placement, obstacles, rewards, and more — all without relying solely on visuals.
❌ What 3D Level Design Is Not:
-
It’s not just placing 3D models or assets in a scene
-
It’s not about graphical fidelity or visual polish
-
It’s not the same as environment art or architecture
-
It’s not just about looking good — it’s about playing well
🎯 What’s the Core Purpose of Level Design?
-
Guide players intuitively without breaking immersion
-
Shape pacing and challenge vs. rest moments
-
Convey narrative through space
-
Introduce and evolve game mechanics
-
Trigger emotion: fear, excitement, curiosity, etc.
Well-designed levels teach without tutorials, tell without words, and entertain without excess.
📈 Why It Matters More Than Graphics
3D Level Design Graphics Defines how the game plays Defines how the game looks Delivers emotional pacing Delivers visual flair Focuses on mechanics & flow Focuses on style & surface Invisible, but essential Visible, but not always engaging Example:
-
Minecraft: Basic visuals, but deep level design = iconic
-
Superhot: Minimal graphics, clever spatial design = award-winning
-
On the flip side, many visually stunning games fail due to weak level design that feels empty or disjointed.
🧠 Core Skills of a 3D Level Designer
A good 3D level designer combines:
-
Game Design Thinking — understanding gameplay logic
-
Architectural Sense — shaping spaces with flow and structure
-
Cinematic Mindset — creating rhythm, tension, and player guidance
💬 A Quote to Close:
“Great level design is invisible. The player doesn’t notice the design — they feel the experience.”
— Clint Hocking, Lead Designer, Far Cry 2 -
2. Story & Scenario: Building the Foundation
🧠 Why Every Level Needs a Micro-Story
Even if your game isn’t narrative-driven, each level needs its own micro-story — a 3-line scenario that defines:
-
What the player is doing here
-
Why it matters
-
How the environment reflects that goal
This story shapes:
-
What the player sees
-
What they hear
-
What they do
-
And how they emotionally experience the level
🧪 Brainstorming Framework: 10-Word Summary (No Verbs)
Before you write a full scenario, try this:
Describe the level’s experience using exactly 10 words
No verbs. Only nouns, adjectives, or phrases that evoke mood, goal, conflict, or theme.
🎨 Example:
Ruined city, broken bridge, hidden threat, echoing wind, silent countdown.
From this, we sense:
-
A broken, perhaps post-apocalyptic environment
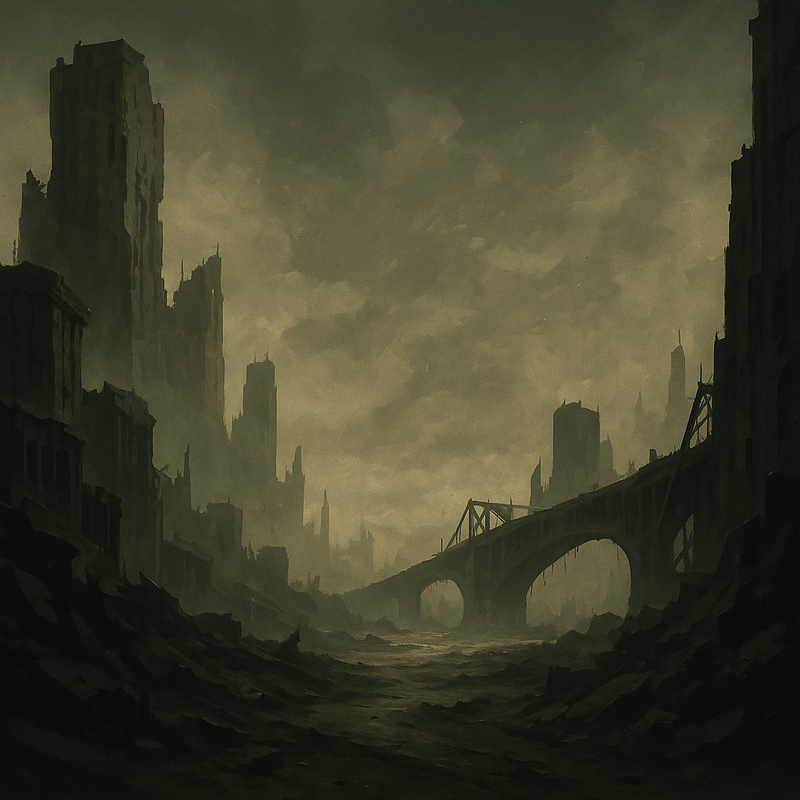
Urgency and tension (countdown)
-
Exploration or danger (hidden threat)
-
Atmosphere (echoing wind)
This builds a mental space before we write anything.
🧱 Step 2: The 3-Line Scenario
Now, shape your idea into a minimal scene. Here’s a 3-line template:
-
Where are we and what’s happening?
-
What is the player trying to do?
-
What stands in the way or twists the situation?
🧩 Example based on the 10-word brainstorm:
The player enters a collapsed city trying to reach a safe zone.
The bridge ahead is unstable and rigged to collapse.
A hidden enemy is watching, ready to trigger the final trap.
This gives you:
-
Narrative direction
-
Gameplay beats
-
Emotional tone
🎧 How Does the Player Feel the Story?
Don’t rely on cutscenes. Instead, design so the environment tells the story through:
-
Visual storytelling (e.g. a half-destroyed bridge = urgency)
-
Sound design (e.g. sirens, distant voices, wind)
-
Environmental cues (e.g. graffiti, collapsed buildings, remnants of past lives)
-
Player interaction (e.g. triggering events, dodging falling debris, following a visual trail)
🎯 Design Prompt You Can Use:
Before building any level, answer:
What does the player see?
What do they hear?
What can they affect?
💡 Pro Tip:
Use this 3-line story and 10-word core as your Level Bible. Share it with the environment artist, sound designer, and gameplay programmer. Everyone will know the soul of the level.
3. Whiteboxing: Building the Playable Core
🎮 What Is Whiteboxing?
Whiteboxing (or Greyboxing) is the process of creating a rough, functional version of your level layout before adding any visuals, art assets, or final models.
Think of it like architectural sketching:
You use simple shapes (cubes, ramps, planes) to block out:
-
Movement spaces
-
Player paths
-
Obstacles and gameplay areas
-
Viewpoints, verticality, and pacing zones
You’re not trying to make it look good — you’re trying to make it play well.
💡 Why It’s Essential (Not Just for Platformers)
Many developers mistakenly associate whiteboxing only with platformers or linear action games — but in reality:
-
Creative sandbox games like The Sims, Minecraft, and Spore all rely on carefully designed intro/tutorial stages
-
Even open-world games have structured “onboarding spaces”
-
Whiteboxing allows experimentation without wasting time on polish
It’s where level designers solve problems, test mechanics, and discover flow.
🎯 What Should You Define in a Whitebox?
Here’s what a good whitebox should capture:
| Element | Why It Matters |
|---|---|
| Player Movement Patterns | Running, jumping, hiding, gliding, stealth, etc. |
| Camera Angles & Restrictions | Especially important in 3D — what should the player see? |
| Obstacles & Walls | Guide player flow, add pacing and challenge |
| Interactive Zones | Levers, switches, dialogue areas, puzzles, etc. |
| Checkpoints & Save Zones | Help test pacing, progress saving |
| Hazards & Traps | Where is danger? What must be avoided? |
| Choke Points or Event Zones | Places where something specific must happen |
🧠 Pro Tip: Think Like a Director
In the whitebox phase, you’re directing the player’s attention, emotion, and choices.
-
Where will they look?
-
What will they try to interact with first?
-
When should they feel safe, lost, challenged, or rushed?
🔧 Tools You Can Use (At This Stage, Be Free!)
You don’t need to jump into Unreal or Unity right away. Start dirty. Start fast.
📝 Offline Tools:
-
Pen and paper sketching
-
Graph paper layouts
-
Foamboard, cardboard, LEGO, or even physical models
🖥️ Digital Tools:
-
3D software like Blender, SketchUp, or Tinkercad
-
Level design plugins for Unity/Unreal (e.g., ProBuilder, Geometry Script)
-
Simple blocky game engines like Roblox Studio or Godot’s GridMap
The goal is to visualize and test the space, not make art.
4. Concept Art & Visual Design
-
🧠 Do You Always Need Concept Art Before Whiteboxing?
Not necessarily.
While many tutorials say “start with concept art,” that’s not a rule — it’s a choice.The right pipeline depends on your team structure and collaboration style.
🚦 Two Common Scenarios:
✅ Scenario A: You have creative concept artists
These artists understand gameplay and love co-creating experiences.
👉 In this case: Involve them early, even before whiteboxing.-
Let them inspire the world-building and mood
-
Their art can spark gameplay ideas and shape geometry
-
They can help define the emotional tone and flow
🔁 Work with them in parallel as the level evolves
🚫 Scenario B: You have visual-only concept artists
They focus on making beautiful art, not functional levels.
👉 In this case: Start with a whitebox, then hand it to them. -
-
-
Use the whitebox to define layout, scale, and flow
-
Let them build style on top of structure
-
Prevents wasting time on environments that look amazing but don’t play well
✂️ Whiteboxing filters out unplayable fantasies
🧩 What Is Concept Art Really For?
Good concept art isn’t just “pretty.”
It’s a visual tool for solving design problems:Function Why It Matters Establishing Mood & Theme Sets emotional tone (e.g. lonely, majestic, eerie) Camera & Composition Helps frame critical angles and focal points Lighting Exploration Early lighting studies affect scene readability Material Language Stone, metal, fog, rain, vegetation… what lives here? Structural Suggestions Helps inform architecture, pathways, entrances, cover spots Asset Planning Tells 3D artists what kinds of props and elements to build 📐 From Broad to Detailed
Concept art moves in layers of fidelity:
-
Establishing Shots – wide angles to define overall feeling
-
Key Views – focus on high-action or emotionally important spots
-
Detail Concepts – doors, walls, props, textures, etc.
-
Lighting Passes – value studies or mood lighting guides
✍️ Pro Workflow Tip:
“Always have a function-first mindset when reviewing concept art.
Ask: Can this space support movement, cover, puzzles, or action?”Use your whitebox as a visual sandbox. Let your concept artists paint on it rather than inventing structures in a vacuum.
🔄 Summary:
-
Concept art can come before or after whiteboxing
-
Collaborate if your concept artist is gameplay-aware
-
Whitebox first if your artist is purely visual
-
Great concept art serves design, not just style
-
5. Environmental Design: From Blockout to World
You’ve got your whitebox.
You’ve got your concept art.
Now it’s time to turn that skeleton into a living, playable environment.
Sounds easy?
It’s not.
This is the stage where teams often fall into scope creep, feature bloat, and endless reworks.
🧰 Tools and Dependencies — Your Engine Defines Your Workflow
This phase depends heavily on:
-
The game engine you’re using (Unreal, Unity, Godot…)
-
The tools available (terrain editors, foliage painters, modular asset kits)
-
And most importantly: the docs and design you’ve already created
If your whitebox and scenario documents are weak or incomplete, this stage becomes chaotic.
👥 What Happens at This Stage?
It’s time for cross-team action.
| Role | Responsibility |
|---|---|
| 3D Artists | Build final models based on concept art + blockout |
| Animators | Implement movement, NPC behavior, or environmental animations |
| Programmers | Hook up mechanics, logic zones, and interactions |
| VFX/Lighting | Add atmosphere, particles, and dramatic lighting |
Missing something? That’s normal.
But manage it well — don’t let it stall the process.
⚠️ What to Watch Out For: The Trap of Infinite Iteration
Here’s the danger:
“Let’s just tweak this area a bit.”
“What if we added another corridor here?”
“Can we redesign the whole section to feel more magical?”
🚨 That’s how weeks vanish.
You must protect the vision from turning into a loop of tweaks. That means:
-
Locking key layout decisions early
-
Freezing areas that are “good enough”
-
Keeping a list of v2 ideas for the next phase, not now
🧠 Pro Tip: Build Flexible, Not Fragile
If something’s missing — a prop, a sound, a shader — don’t stop the whole team.
-
Use temporary proxies
-
Keep a production log of missing assets
-
Design systems so one missing asset doesn’t block progress
The goal isn’t to build everything perfect from day one — it’s to keep moving forward.
🔁 Summary
-
This is where your engine tools + pipeline documents must shine
-
Everyone — artists, programmers, animators — gets involved
-
You will miss assets. Plan for it.
-
Avoid the trap of endless tweaking
-
Keep momentum over perfection
6. Playtesting & Iteration
-
-
Specific (“Make the platform 1.5m wider”)
-
Assigned (“To Designer X”)
-
Trackable (via Trello, Notion, Jira, or spreadsheet)
🎯 What Is This Phase Really About?
This is not just “try the level and see if it works.”
This is formal quality control — the moment where:-
You discover what feels off, what breaks, what confuses, what bores.
-
You create structured, repeatable feedback loops.
-
You enforce responsibility and accountability in the team.
No amount of graphics, story, or mood can save a level that doesn’t play well.
🧰 Step 1: Test the Level — Like a Player
Play the level from start to finish. Then again. Then again.
Focus on:
Element Questions to Ask Navigation Is it clear where to go? Are players getting lost? Pacing Are there dead zones or action spikes with no buildup? Readability Are interactive objects or paths visually clear? Mechanics Do puzzles, doors, enemies behave consistently and responsively? Performance Are frame drops or asset streaming issues present? Emotion & Story Does the player feel what you want them to feel? 🗂️ Step 2: Log Every Issue — Repetition = Responsibility
Here’s your golden rule:
If a problem is seen 3 times, it becomes a task.
Example:
-
“Checkpoint feels too far apart” — noted by 3 testers
→ Task: Redesign checkpoint spacing in Section B
→ Owner: Level Designer
Repeat this for each issue. Make the fix:
-
🚨 Rule: Min 3 – Max 7 Revisions
Don’t let endless changes kill momentum.
Minimum: 3 revisions per problem.
Maximum: 7 iterations before escalation.If a problem isn’t solved after 7 focused revisions, it means:
-
Either the person doesn’t get it
-
Or the original design is fundamentally broken
In that case:
Change the owner. Change the idea. Move forward.🔒 Be Serious About Accountability
This phase is not about “vibes” — it’s about measurable progress. That means:
-
Testing must be scheduled and repeated
-
Feedback must be documented
-
Tasks must be resolved — or re-assigned
If fixes aren’t happening:
✅ Restructure team
✅ Reset goals
✅ Remove blockers🧠 Pro Tips:
-
Use fresh testers who don’t know the level layout
-
Record test sessions (screen capture + input data)
-
Don’t just ask “did you like it?” — ask “what confused you, what wasted your time?”
🔁 Summary
-
Playtesting is the first real quality control phase
-
Log every issue — 3x = task
-
Assign tasks with clarity
-
Min 3 / Max 7 iterations per problem
-
If no fix after 7 tries → escalate or redesign
-
No excuses. This phase must be clean.
-
7. Tools You Need (and What You Don’t)
-
📖 First Things First: Tools Don’t Replace Inspiration
Before we talk software — remember this:
💡 “No tool can replace real-life inspiration. The best level designers read books, watch films, and play great games.”
So before you open any app or editor:
-
Watch movies with strong environmental storytelling
-
Read novels with spatial tension or progression (especially sci-fi or horror)
-
Play games outside your genre — especially indie titles with creative levels
✍️ Tools for Writing & Narrative Design
For building micro-stories, narrative flow, and scenario structure:
Tool Use Case Notion Story planning, beat sheets, references Google Docs Easy collaboration, comments, structure drafts ChatGPT or Claude AI-powered brainstorming, rephrasing, and outlining Campfire Visual writing tool for story structure, timelines Scrivener Long-form structured writing (great for branching plots) 🧱 Tools for Whiteboxing & Blockout Design
This is where your level layout is born. Use what’s fast, flexible, and clear.
Tool Why Use It Level Forge (Blender Add-on) ⚡ Custom-made, Blender-native, optimized for Unreal — quick blockouts, LODs, collisions, and even lighting setups. Built by your own team! ProBuilder (Unity) Real-time whiteboxing in Unity Geometry Script (Unreal) Scriptable shape-based geometry generation Godot GridMap Simple voxel/block-based layouting in Godot SketchUp Architectural, great for early spatial layout exploration LEGO / Cardboard Yes, physical mockups still work — especially for puzzle design 🧪 Tools for Testing, Tracking & Iteration
To prevent chaos during playtesting and revision loops, you’ll need task & feedback tracking:
Tool Why Use It Trello Visual task board; easy to assign and comment Notion Integrated docs, kanban, databases, feedback tracking ClickUp Advanced project tracking for agile teams Jira Heavy-duty iteration tracking for mid/large teams Google Sheets Simple test log & bug tracker 🧠 Remember: if it’s not tracked, it’s forgotten.
📁 Bonus: Tools for Documentation & Syncing Teams
Every phase — from narrative to whitebox to final pass — should produce documentation. These docs help onboard new team members, avoid repetition, and define vision.
Tool For What Notion Level bibles, scenario docs, feedback sheets Miro Visual collaboration and brainstorming Confluence Wiki-style documentation for larger teams Obsidian Markdown-based local notes and doc trees 🧠 Final Advice
-
Use tools that serve your pipeline — not tools that dictate it.
-
Keep things fast, editable, and visible to everyone.
-
Update your documents at the end of every phase.
-
Make feedback trackable and actionable — tools only work if you use them properly.
-